Setting up your Spring Boot/Java app to access a privately secured SSL API over an internal network

Hey there 👋🏼. I'm Eyram, a backend software engineer and technical writer based in Accra, Ghana. I love solving problems, and I am always open to a good challenge. My current areas of interest are developer advocacy and technical content creation. I'm also an avid reader and writer and I love to share my knowledge with other developers through writing.
I have had some stressful encounters in the past with configuring and testing APIs secured with private SSL certificates but I eventually prevailed 💪🏽. This guide is for anyone who is having the same problems I experienced or is new to using private certs and wants to understand how to properly set up their applications and environments to use them.
Those who are pressed for time can use the table of contents to jump right to the steps they are interested in. But if you have some free time, I'd suggest reading the complete guide.
SSL Certs and Modern Applications
Securing your APIs with SSL certificates is an essential requirement in the world of API development and integrations today. Almost all companies require your APIs to be secured with SSL/TLS certificates before they integrate with you. If you were wondering, SSL certificates are files on a web server that enable websites/APIs to move their URLs from HTTP to HTTPS, and SSL is a protocol for encrypting internet traffic. In summary, SSL certificates are digital certificates that authenticate a website's identity and enable an encrypted connection.
Companies need this level of security to ensure that information sent back and forth across the internet when interacting with your APIs is encrypted and no one else can understand it. This type of security is especially critical when they transmit sensitive data like usernames, passwords/pins, and payment information. Failing to secure this information opens the door for malicious actors to attack. In addition, SSL certificates also grant access to only specific categories of users within an internal network.
This guide touches on the three main categories of SSL certificates, i.e., self-signed certificates, publicly signed certificates, and privately signed certificates. I'll briefly discuss self-signed and publicly signed certificates. However, the emphasis will be on using privately signed certificates and how to configure your spring boot application and java server to access APIs that use them. I touch more on privately signed certs because accessing them involves a little more configuration from the developer, unlike public certs, which are easier to access.
You can visit this link to read further on SSL certificates.
Self-Signed Certificates
Self-signed certificates are certs not signed and issued by any publicly trusted certificate authority(CA); they are user-generated certificates, hence their name. Developers mostly use them for securing non-production apps and sandbox integration endpoints and prefer them because they are quick and easy to generate and cost no money.
Though they provide SSL encryption, they cannot be fully trusted for several reasons. One of the reasons is that they have no expiry date and are, therefore, not subject to renewals and security updates. This means that security vulnerabilities that may come up in them are never resolved, and this could expose websites that use them to hack attacks.
Another reason is that no public CA confirms the legitimacy of website owners using these certs. As a result, customers cannot trust the security of these websites because they have no way of knowing if the site owners are hackers.
It is possible to classify self-signed certs as both public and private certificates. This is because developers can use them to secure public-facing sites and internal/private apps. However, the primary difference between them lies in the trust. Unlike public and private certs, users cannot trust websites that use self-signed certs. They are not inherently designed for public-facing use and carry many risks that could expose sites to hackers. Therefore, developers are encouraged to restrict their usage to non-production apps only.
Publicly Trusted Certificates
Publicly Trusted Certificates are certs used by public-facing APIs so that everyone can have access to them. Additionally, native browsers trust them. They are usually issued by an external, trusted third-party certificate authority or CA for short (e.g., Entrust, DigiCert, etc.), who verify domain/website owners. These certs do not require clients to authenticate themselves; hence, developers need no special config in their applications when making calls to services that use them. They are mainly used for traffic encryption on websites and APIs.
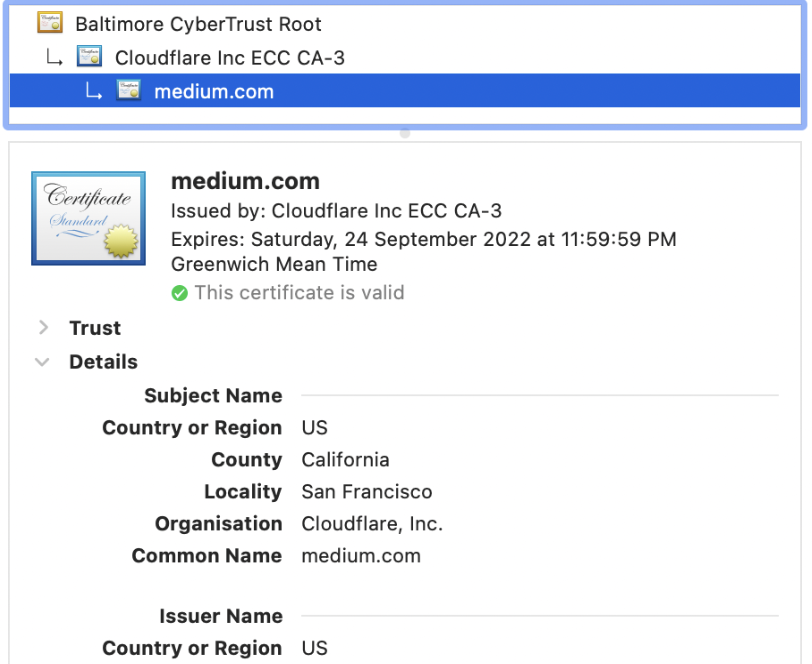
An example of a website that uses a publicly trusted cert is https://medium.com/.
Privately Trusted Certificates
Unlike publicly trusted certificates, privately-trusted SSL certificates are used for securing APIs that are not open to public use but only to a select group of users or applications over an internal network. They are used for both user authentication and data encryption.
Companies that use private certs usually issue them since they have a dedicated internal public key infrastructure(PKI). In such cases, they are their own certificate authority or private CA for short; however, some companies lack the infrastructure and depend on public CAs (e.g., Entrust, DigiCert, etc). to issue their private certs.
Banks, telecommunications firms, and fintech firms are a few examples of businesses that employ private certificates. Their APIs handle sensitive transactional data, hence they require the functionality of private certs. The rest of this guide explains the steps for setting up your app and server with the ability to make restful calls to APIs secured with private SSL certs.
Step 1: Generating a CSR for signing by the private CA
This is first step in the process. To access an API secured with a private cert, the private CA needs to be able to verify/authenticate your identity or the identity of your company. What they use for this authentication is a certificate signing request (CSR for short). A CSR is a file you generate on your server or environment containing information identifying your company/business to the private CA. OpenSSL is usually used to generate this file(OpenSSL is an open-source command line tool for SSL operations). You can, however, use other alternatives like LibreSSL, GnuTLS, and SimpleAuthority.
The CSR should have details about your company, e.g. (organization name, country, email address, etc.), all in an encoded text format. It should also contain a public key that SSL uses to encrypt transmitted data sent to the private CA during an SSL session. In addition to the public key, the CSR creation process also generates a private key making a public/private key pair.
Your application will need the private key to decrypt data from the private CA, so this key should be hidden and not shared with anyone.
The following command generates a CSR. NB: I use centos 7 for my examples.
openssl req -new -newkey rsa:2048 -nodes -keyout mydomain.key -out mydomain.csr
mydomain.key and mydomain.csr are the names of the private key and CSR to be generated from this command.
Remember to replace mydomain with your preferred name or the name of your company/organization.
After running this command via terminal on your server, you will receive a prompt to enter information about your company, e.g., country name, state, or province name.
Once you enter that info, your CSR will be generated and have the extension .csr. You can visit this link for more details on the CSR generation process.
Now, you can send your CSR to the private CA for signing. The private CA validates your organization's info contained within the CSR. Once validated, they sign it and generate an SSL certificate which they return to you. A signed certificate means the private CA trusts your organization and allows all API requests you send to them.
Step 2: Generating your PKCS12 or your P12 key store file from the signed certificate
As mentioned in step one, the private CA signs your CSR and returns you a signed certificate file and another file which is their public certificate which you or may not use depending on your use case. Both cert files should have a .crt extension.
Since your cert is now trusted, your application must transmit the cert information with your request when making API calls to the private CAs API. Not adding this information will make you come across as an untrusted caller, and the private CA will block your requests.
Now, your application cannot use the raw
.crt cert files
during the SSL session or API call, it needs another means of transmitting the cert info, and that is when the P12 or PKCS12 key store file comes in. The P12 file is a cryptographic archive file that stores all your certificate objects in a single file. I.e., your public key, private key, certificate, and the private CAs certificate info. Your application will use/reference this when calling the private CAs API.
This command exports all your certificate objects into your P12 file.
openssl pkcs12 -export -out mydomain.p12 -inkey mydomain.key -name "mydomain" -in mydomain.crt -certfile private_ca_external.crt -password pass:some_unique_password
Remember to replace mydomain.p12 with your preferred name. This next command imports the public certificate of your private CA into your P12 file.
keytool -import -alias "m3_external_ca_GH" -file private_ca_external.crt -keystore mydomain.p12
private_ca_external.crt is the public cert of the private CA returned from step 1.
Great!!. We have a P12. Now you simply need to reference its location and password in your
properties file and the spring boot app will pick it up when initiating API calls to the private CAs API.
Step 3: Trusting the public certificate into Java's cacerts
For servers/applications that do not receive API requests or callback requests from private CAs, steps 1 and 2 are all you need to make successful one-way API calls. However, for those who do, you will need to trust the public certificate of the private CA. You need this step because every time the private CA initiates an SSL session or sends a request to you, the JVM installed on your server checks the private CAs certificate and authenticates it against Java’s root certificate store called the cacert. If the cert is not present, it blocks the request.
There are also instances where one-way API calls to the private CA do not work even after steps one and two. This is because, in addition to referencing the P12, the JVM also attempts to reference the private CAs public cert from its cacert during API calls. This issue should be resolved by importing the private CAs public cert into the JVM's cacert.
The command below is for trusting a java cacert:
keytool -import -trustcacerts -keystore /usr/java/jdk1.8.0_231-amd64/jre/lib/security/cacerts -storepass changeit -import -file private_ca_external.crt
Once you run this command, the public cert is now trusted, and the JVM will now allow requests from the private CA.
Quick note: /usr/java/jdk1.8.0_231-amd64/jre/lib/security/cacerts is the path to the java cacerts on my environment, you will need to change it to the path on yours.
Step 4: Testing connectivity with your cert files via SSLPoke
After performing the steps above, you should test your connectivity to the private CAs API via terminal using your keystore files. Doing this saves you from tampering with your application code if you encounter any SSL connectivity issues during integration tests.
The SSLPoke command performs this connectivity test on the endpoint/IP and private CAs port. SSLPoke is a command to test connectivity and verify that your keystore –i.e., P12 and cacerts– contains the proper certificates.
To run this command, you simply need to download the SSLPoke.java file to your server.
Once you have it, you run the javac SSLPoke.java command to compile it into a java class file.
Now that you have the SSLPoke.class, you can run the SSLPoke command below:
java -Djdk.tls.client.protocols=TLSv1.1,TLSv1.2 -Djavax.net.ssl.trustStoreType=jks -Djavax.net.ssl.keyStore=mydomain.p12 -Djavax.net.ssl.keyStorePassword=pass2020 -Djavax.net.ssl.trustStore=/usr/java/jdk1.8.0_231-amd64/jre/lib/security/cacerts -Djavax.net.ssl.trustStorePassword=changeit -Djavax.net.debug=ssl SSLPoke your_private_cas_ip_or_hostname 8090
This command takes your P12 keystore, the JVMstruststore, and the private CAs IP and port as parameters. You should expect a response that says Successfully connected if you generated your keystores properly and you have no connectivity issues.
However, this is not always the case. There are instances where SSLPoke fails because you might have encountered an issue when generating your P12 or importing the public cert into Java’s cacerts. From my experience, it's almost always from keytool errors when importing public certs into my P12 file. Anytime I experience this error, I usually resolve it by running the commands for generating the P12 on a different java environment and then bringing the generated P12 file back to my original environment.
But, if your issue is with importing the public cert into the cacerts, you can run this command to list all the imported certs in Java’s cacerts to confirm if the public cert is a part of them.
keytool -list -keystore ${path_to_cacerts_file}
If it's not in the list, you can simply reimport it, but in case it is, you can delete it and rerun the import command. Below is the command to delete an imported cert/key from cacert.
keytool -delete -alias ${cert.alias} -keystore ${path_to_cacerts_file}
Commonly Arising Issues
It is possible that even after successfully importing the public cert into Java’s cacerts, there will still be issues when your application is trying to access the private CAs API.
In such a case, the issue could be that your JVM has limited-strength security policy files, also called Java Cryptography Extension (JCE) files. These files contain a set of packages that provide a framework for Java to perform encryption and security operations, and unlimited strength policy files give the JVM full cryptographic strength.
The names of these JCE files are 1.US_export_policy.jar and 2.local_policy.jar.
To resolve this issue, you will need to update the JCE files for all java versions before Java 8u151. For java versions after java 8u151, the JCE framework uses the unlimited strength policy files by default.
To update them for java 8u151 and earlier, download the latest files from here. Once you have them, unzip and import the files into your java security folder. For Java 8 and earlier, you can find the security files in ${JAVA_HOME}/jre/lib/security folder.
Conclusion
This setup can be a little daunting on the first attempt especially if you run into issues, but it gets easier with practice. If you have got this far then it means you have probably made some progress so congrats!!. I hope this article was helpful. Feel free to reach out to me or comment if you have questions. I'm happy to help or point you in the right direction. Cheers.


